

A good client onboarding process reliably delivers first value within days, not weeks, and turns new customers into retained, referring clients. Start today by defining one onboarding objective for every new client and sending a simple welcome pack. The rest of this guide walks through the steps, checklist, models, automation and legal basics that make that outcome repeatable.
TL;DR:
- Automation should focus on repetitive tasks like confirmations, reminders, and access provisioning, but high-empathy moments must remain personal during early onboarding.
- Tracking key metrics, such as time to first value, onboarding completion rate, and client satisfaction, is essential to identify and fix friction points.
- A clear, documented process with designated owners for each step, including SOPs and templates, ensures consistency and scalability as the business grows.
- Starting with a well-structured 30-60-90 day timeline helps align client and team expectations and measures progress effectively.
- Implementing a workshop approach with mentor guidance accelerates building a reliable onboarding process tailored to specific client needs.
Client onboarding is the structured process that takes someone from signed agreement to confident, satisfied user of your service. Done well, it delivers a clear first win quickly and sets the tone for the whole relationship.
Onboarding is where retention gets decided. A client who understands what to expect, feels heard during intake, and sees an early result is far more likely to stay, pay on time and refer others. A client left confused in the first fortnight rarely recovers that trust, no matter how good the service becomes later.
Most onboarding fails for predictable reasons:
The steps, checklist and SOP guidance below are built to close each of these gaps.
Treat onboarding as a sequence with a named owner and a clear outcome at each stage, not a vague “settling in” period.
Pro Tip: Assign one internal owner per onboarding step, even in a small team. Shared ownership is how steps quietly get skipped.
Not every client needs the same level of hand-holding, and trying to deliver white-glove service to every price point burns time you cannot recover.
Choose a model based on price point, how complex the service is to set up, and how comfortable the client is with handling things digitally themselves. Many businesses run a hybrid: start high-touch for the first milestone, then shift a client to low-touch or tech-touch once they are confident, keeping your team’s time focused where it adds the most value.
A written checklist beats memory every time, especially as your business grows past the point where one person can track every client’s progress.
Keeping these as reusable templates, rather than writing them fresh for every client, is what makes onboarding consistent as you take on more work.
Automation should remove admin, not remove the relationship. Start with the parts of onboarding that are repetitive and low-empathy.
A CRM, form builder or client portal are the usual tool categories worth comparing. Measure success by tracking time saved on admin and whether drop-off during onboarding improves after each change, rather than assuming automation is working.
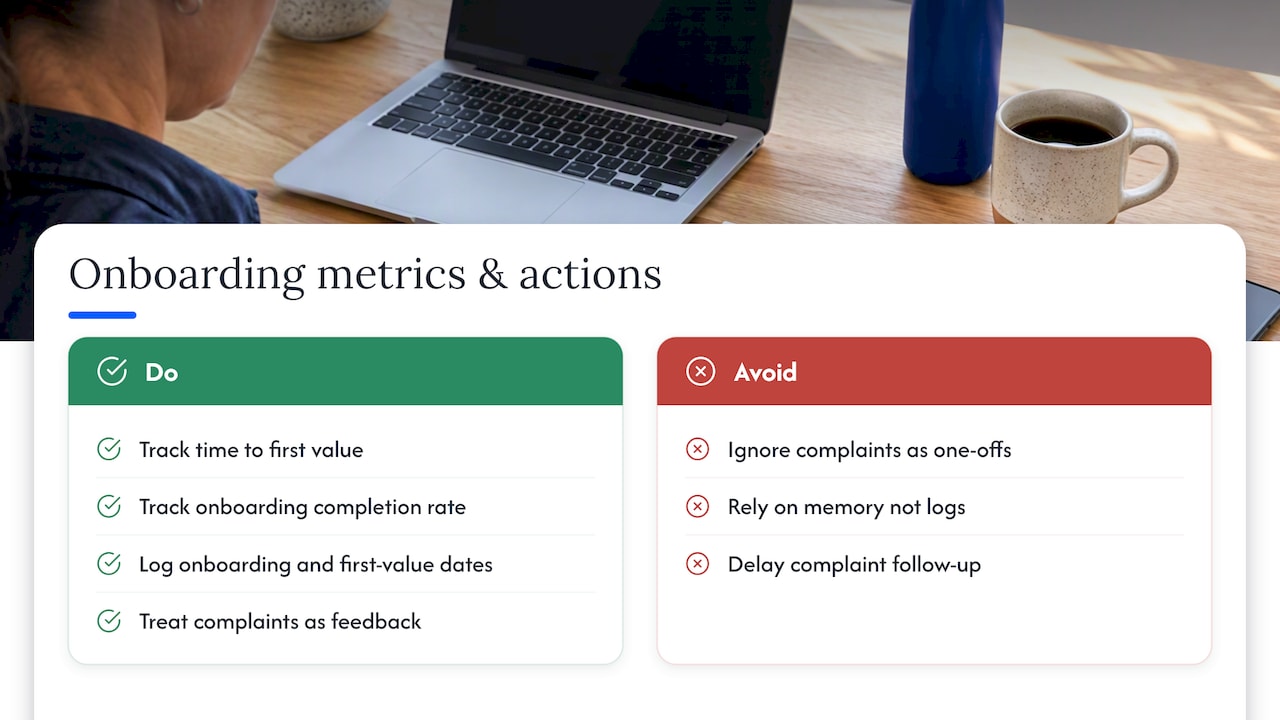
You cannot improve what you do not measure, and onboarding is one of the easiest parts of the client journey to instrument simply.
Track time to first value (how many days until the client sees a result), onboarding completion rate, where clients tend to drop off, retention at the 90-day mark, and a basic satisfaction score such as NPS or CSAT. A spreadsheet or CRM pipeline stage is enough to start: log the date each client enters onboarding, the date they hit first value, and whether they completed every step.
Treating customer complaints as feedback data, not just problems to close, turns your worst onboarding experiences into the clearest signal for what to fix next. A structured six-step approach to listening, recording and following up on complaints helps you spot the same friction point before it costs you the next client.
Getting the legal groundwork right during onboarding protects both you and your client, and it is far easier to build in from the start than to retrofit later.
Once your onboarding sequence works, write it down properly so it survives staff changes and stays consistent as you grow.
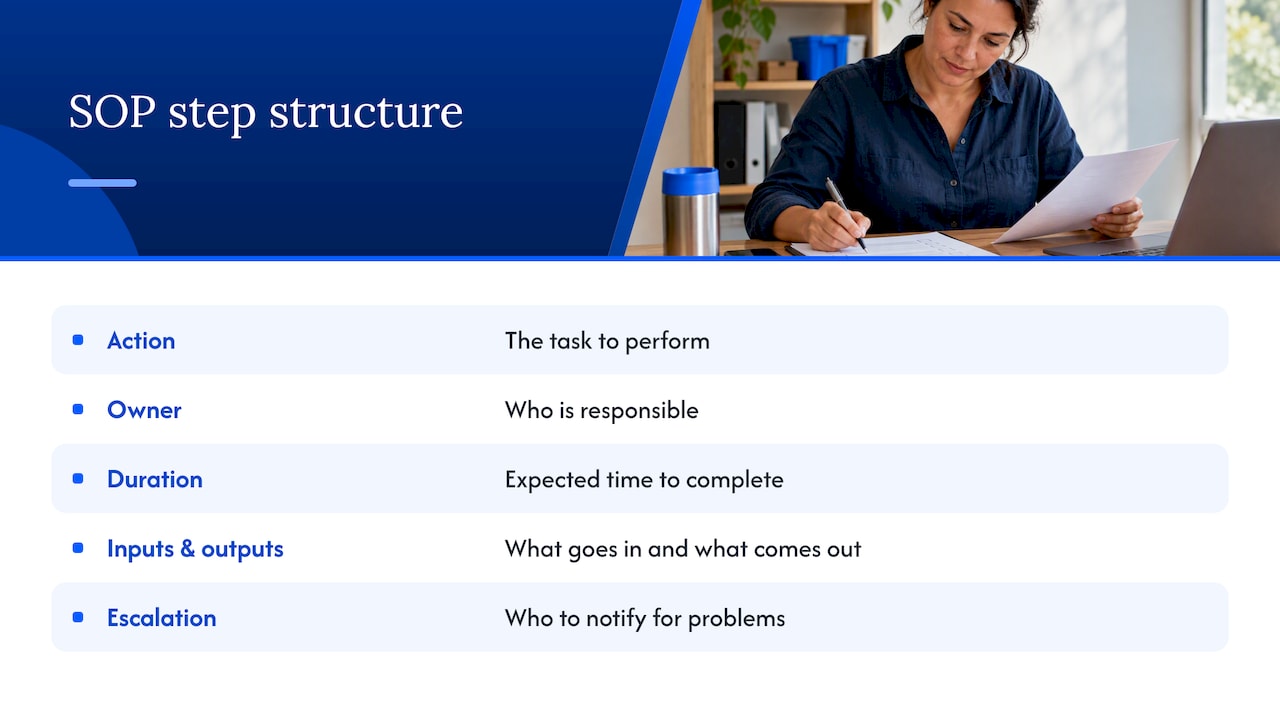
A useful SOP structure for each step notes the action, who owns it, how long it should take, and what goes in and comes out of it. Define who escalates a problem and to whom, so a confused new team member is not guessing mid-onboarding. Documented processes and procedures translate your high-level approach into steps staff can actually follow, which is usually where onboarding quality breaks down in growing teams.
Pro Tip: Review your onboarding SOP every quarter and ask your team where they deviated from it. That gap is usually where the next improvement lives.
A simple timeline gives both you and the client a shared sense of progress.
Adjust the timing for complexity and price. A simple, lower-cost service might compress all three milestones into the first month, while a complex engagement might stretch 90 days into six months.
Reading a step-by-step process is one thing; building it into your business without months of trial and error is another. A three-phase workshop structure can guide you through planning your onboarding objectives, building templates (welcome packs, intake forms, kickoff agendas), and training your team to run them consistently. Rather than guessing at what “good” looks like, you work through it with mentor feedback and practical, ready-to-use frameworks, helping reduce wasted hours rebuilding processes from scratch and improve consistent delivery from the first client onward.
If you would rather implement this with structured guidance than build it alone from a blog post, our #1 Business Strategy Workshop is the natural starting point: it covers the planning and SOP groundwork this whole process depends on, for 1,495 AUD per year including a full year of access to materials and live Q&A.

If you are not sure where to begin, browse our full workshops catalogue and pick the one that matches where your onboarding process is weakest today.
The core sequence runs from preparation and contract through intake, kickoff, configuration, training and handover, finishing with a go-live acceptance check. Each step should have a named owner and a clear output before the next one starts.
Definitions of the “5 C’s” vary across industries, so there is no single agreed version worth quoting as standard. The practical fundamentals that matter regardless of label are a clear objective, a documented process, defined client and staff responsibilities, consistent communication and a measurable first result.
The 30-60-90 rule breaks onboarding into three milestones: a first result by day 30, full setup and training by day 60, and a settled, satisfied client relationship by day 90. Timing shifts with service complexity and price, but the structure gives both sides a shared sense of progress.
Onboarding typically moves through preparation, contracting, intake, kickoff, setup, training and go-live acceptance, in that order. Writing these as a documented, repeatable sequence with assigned owners is what separates onboarding that scales from onboarding that depends on one person’s memory.